Building a mechanical keyboard

Building mechanical keyboards is so much fun. Even though I own a few of them, I had never built one from scratch, until now. Let me share with you a few of the things I’ve learned since I started my journey into this hobby.
There are many factors to consider when building a mechanical keyboard. For example: The size (how many keys), the form factor (ortholinear vs staggered, alice layout, split), the switches (quiet, noisy, super responsive), the weight, portability, the materials, the keycaps, colors, and the list goes on. When it comes to keycaps there are many types too! It can feel overwhelming in the beginning, but it’s not too bad.
The process can be intricate or easy. Luckily you can pick your poison here. You could find yourself pulling apart the board’s different layers, soldering switches onto it, or you could just be connecting different parts like Lego pieces. Your choice.
The most exciting aspect of putting together a keyboard, at least for me, is being able to mold it to my needs. As a software engineer, I’d say this is the most important part because it doesn’t matter how pretty the keyboard may look if I cannot customize it. I need to be able to take the functionality to a whole other level: I need to be able to change the keyboard layout and remap the keys.
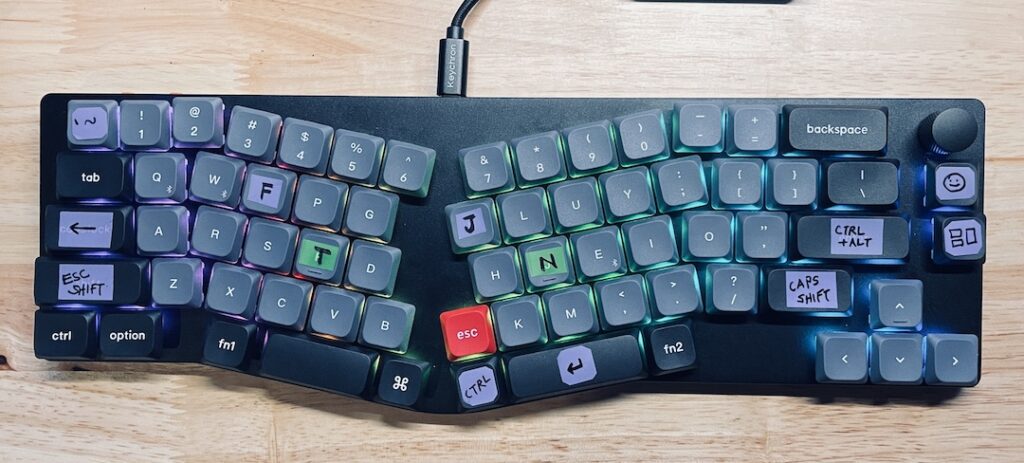
I spend most of the day writing code. There are many repetitive tasks in the code writing process, and whether it is for your own sanity or to prevent injury, you want to make those tasks as streamlined as possible. Here’s the thing: the layout of a regular keyboard is not optimal. Your hand movements are all over the place, and it can easily result in fatigue after many hours of work, leading to injury over time. When writing code I want to have certain keys closer to me (to my home row) so my fingers or hand movements are not drastic. I want to use an optimal keyboard layout, like Colemak, and I want to remap keys. For example, the infamous CAPS key is not used as often as the backspace key, or the escape key (Vim). I can make the CAPS key behave like a backspace or escape key, depending on my needs. I can create customized shortcuts, assign actions I didn’t even know existed (like double taps, hold and tap, etc), and so much more. I can even assign a key to trigger the emoji panel, so that I don’t have to do the hand acrobatics when pressing command + ctrl + space 😜. I’m only scratching the surface here.
There’s software out there, like VIA or Oryx, that facilitates doing everything mentioned above. Overall, I’d say that figuring out the software it’s not that hard, but there’s so much to learn. The nice thing about using the software is that you can save your configuration. If at some point you reset your configuration it’s great to know that you can flash your keyboard and bring everything back again.
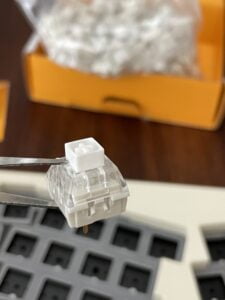
The heart and soul of each key you press is the switch. There are many flavors when it comes to how responsive they are, or even the noise they make (if I can put it that way), and colors will give you that. Switches come in a variety of colors. Red switches are fast and silent. Blue switches are clicky and fun. I prefer blue. Switches are swappable. I can change them at any time and doing so will pretty much give you a brand new keybard. The best part is that they are not that expensive.


The first keyboard I built was a failure, and that’s okay. But it wasn’t a total failure, it’s just that not being able to run my customizations makes it look like so. I had bought a barebones kit from Amazon. From what I gathered when I was looking for it, there aren’t many known name brands on whose reputation you can rely on. So, I ended up ordering a board by a chinese company I didn’t know, but I had seen others on YouTube videos working on it.
The kit looked as expected. Unlike others, I didn’t pull it apart to remove or add layers. No thank you, haha. I just went straight into installing the switches. The first thing I didn’t like was that it wasn’t clear how the switches fit on the board because the layer on top was poorly punctured. In hindsight, maybe I should have removed that one layer. Fast forward, I finished adding the switches, putting on the keycaps, messed up a thing or two, fixed them, turned it on, and voila, a new keyboard was born. By default, a Qwerty keyboard.

The obvious next step was to start remapping the keys. For that I would use VIA keyboard configurator. In order to start configuring the keyboard with VIA you need some JSON file that the manufacturer should have provided. Things went uphill from here because I didn’t have it, there was no documentation, and I ended up trusting some random person on the internet with a JSON file 🤯. After loading the file I was able to change a few things, but not all I intended. So, it just didn’t work. It was really good looking. I had put on some blank keycaps I had from another keyboard and it made it look like some sort of retro computer keyboard from way back. Unfortunately, I had to remove all the pieces and return it.
I’m stubborn and I don’t give up easily. I had my mind fixed into building a keyboard. So, I started researching again and this time I finally found a brand that aside from selling you mechanical keyboards already built, they also sell you barebone kits. This brand is Keychron. I learned that they offered their own software for customizing it, which seemed like a branded version of VIA, but you can also use VIA (I tried both and both work). This time I decided that I didn’t want to deal with the barebones kit. Instead, I made sure to order a keyboard with “swappable switches”. It kind of made sense because you get switches and keycaps for almost the same price of a barebone kit. I ordered mine with red switches (blue weren’t available). I didn’t care about it because I already had spare blue switches and I can use the red ones later on another project.

The second attempt was a success. It was so much easier to work with Keychron (I’m not being sponsored here). They provide good documentation, JSON files, firmware files, etc., and I customized the keyboard relatively fast. Everything worked and I was happy.